|
Rok International Industry Co., Limited.
|
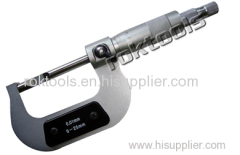
High Accuracy Top quality Blade micrometer
| Payment Terms: | T/T,WU;paypal |
| Place of Origin: | Guangdong, China (Mainland) |
|
|
|
| Add to My Favorites | |
| HiSupplier Escrow |
Product Detail
1. High Accuracy.
2. Packed with strong plastic box
High Accuracy Top quality Blade micrometer
The anvil and the spindle have a blade for measuring the groove diameter of shafts, keyways, and other hard-to-reach portions
Price: Lower cost
With ratchet stop for constant force
With a standard bar
Supplied in fitted plastic case
Thickness of blade: 0.4-0.9mm
Manufacturer: ROK international Industry Co., Limited
Brand: ROKTOOLS
Orignal: China

How to use blade micrometer:
Read a vernier micrometer using the same concept that you use reading the sleeve and the thimble. If your micrometer has a vernier ruler, look for the line of the number that almost perfectly lines up with one of the numbers on the sleeve. Count each of these ticks as 0.0001 inches. Use the example in Step 2, only this time with a vernier ruler. Imagine that number 9 on the vernier ruler is almost perfectly lined up with the tick mark on the sleeve. Since each tick on the vernier ruler is 0.0001 inches apart, read that as 0.0009 inches, and add it to the result from Step 2: 0.149 + 0.0009 = 0.1499 inches.
Practice reading micrometers on websites that offer micrometer reading exercises. After you get proficient with those exercises, practice with a real micrometer
Place the object between the anvil and spindle of the micrometer. Twist the ratchet until the object is completely locked in between the anvil and spindle head
Read the last visible number on the horizontal scale located on the sleeve of the micrometer. The scale should read from left to right, starting from zero and ending at the measurement. Each whole number represents 0.100 inches. For example, if the last visible whole number is 5, your first measurement is 0.500 inches.
Count the number of ticks visible to the right of the whole number read in the previous step. Each tick represents 0.025 inches. Multiply the number of ticks by 0.025 (there should not be more than three ticks) and add it to the previous number. For example, if there are two ticks to the right of the number 5, add 0.050 inches to 0.500 inches, resulting in 0.550 inches.
Read where the horizontal line lines up with the vertical line on the thimble located to the right of the horizontal line. For example, if the horizontal line lines up with the number 12 on the vertical line of the barrel, add 0.012 to the measurement produced in the previous step. This results in 0.550 inches plus 0.012 inches, producing a final measurement of 0.562 inches.
Exchangeable blade for long life span.


